Image above captured on the upper deck of the layout where scenery has progressed to some extent...
Shot with Olympus C-750

Welcome to the SP Oregon Division!

An N Scale RR depicting the good old days along "The Friendly".

Sunday, December 15, 2013

Oregon Division Timetable Hits the Presses


With the expansion getting closer to being put into full service, I've been plugging away on the Timetable that had been put on hold for so long.  The General Rules had grown to three pages (which was a bit intimidating to newcomers), so I reworked them back to the basics, and consolidated the remaining rules and  instructions into the new Timetable.  Multiple copies will be placed around the layout during ops, as well as having pages available on the blog here.  The TT cover was scanned from an SP original and printed on colored card stock to match the proto design, but have some name changes adjacent to the appropriate division offices to implicate fellow operators.  Pages inside were configured very similar to the original format, but instead reflecting the actual workings of the layout here as needed.  Inside the cover includes the typical pages of Special Instructions (for the Division as well as the Subdivision), a modified Station listing that coincides with the layout, and a copy of the original SP division map.  Additional pages were added to help operators, including signal configuration chart, as well as a layout track chart.  The rear cover is printed on the same colored card stock, but has changes to the oral authorization to make access to this info easier.  Future pages will appear as the layout grows more, like planned scanner and dragger detector information page, etc.  A more revised version of the station listing page might appear soon, in an effort to get that page a bit closer to the original TT configuration. A fun piece of work that adds another dimension to the overall layout during operating sessions.  I have updated the "Insight on Operations" page with the revised General Rules, latest form changes, and also added the Timetable pages there.  Visit this link to view the "Insight on Operations" page. 

Back to working on the RR...     :)

Sunday, October 27, 2013

SD9 Sound Unit Stall Issue Resolved

As we were running some test trains over the layout for the first time in months, we noticed that the two SD9s were acting up again.... but finally a new clue arose to help pursue the cause.  They had been overly sensitive to power drop-out, making the decoders reset with the slightest power interruption.  Now these units were resetting when an adjacent power district went into overload mode.  In other words, if a train in a different sub district on the PM42 shorted out, the PM42 would cycle its overload relays, which caused a power drop or sag in the sub district that the SD9s were in.  Unlike any other unit on the layout utilizing the same decoder board, this demonstrated that these decoders were not fixed as previously hoped.  After trying an experiment with super-caps to make a temporary keep-alive circuit (as Ray has been installing in some other HO units), we did some extensive testing and were able to determine that the sound level output on these two units, had a direct relationship to the problem; but no matter what the sound settings, the units would only work reliably as long as they still had an oversize bank of capacitors attached.  After messing around long enough, I finally got to the point where I just cleared out the custom 567 sound project that I had previously installed, then loaded the Digitrax GP38 file back into the decoder instead.  Problem solved!  It appears that it was a corrupt sound file causing the stall issue, or an unknown sound CV setting?  Lot of lost hours in getting these sound units back in reliable running order, but glad to know operators will be able to run the local jobs from now on without issue... even if they don't have the correct sound project for now. 

Friday, October 25, 2013

Final Phase Expansion Project Benchwork


I have been feeling a bit overwhelmed with the size of the layout and all that needs to be done (let alone maintenance), so glad that there is no more space to allow any further expansion at this point...  To me the images below make this project look a little less significant than when one shares the room with it, but it actually consumes nearly 60 sq feet of floor space.

Anyhow, trackwork has been tied into the main layout for the new Hampton section.  The Hampton spur track is lower priority and will follow later since its a hand laid turnout.  I made some progress on getting this section wired, but then decided to push the rest of the way through to complete benchwork for the expansion project.

So I confronted a few issues while selectively compacting everything in an effort to make it all fit on the upper level.  I had intended to eliminate one more loop from the helix in exchange for the upper deck trackage, but that caused issues with the mainline grade being too steep to reliably set out cars for the KN interchange, possible issues with the KN power being able to handle the branchline grade, and squeezed the bridge scene too low at Hampton.  Now I have framing in for the upper level which is basically flat running, and have made it to the point where I am ready to lay cork for the mainline section.  The roadbed for the Klamath Northern interchange, and also part of its branchline have been started; but are low on the priority list at the moment, as this is another project in itself (lots of code 40 turnouts).

Still some wood work ahead when I have to consider all the masonite sections needed for backdrops and fascias.  One of these backdrop sections will act as a scenic divider running down the middle of the upper level, which should change the atmosphere of the whole room, so anxious to get that in.  Most of my fellow modelers paint and install backdrops early on, but I have put off backdrops mostly due to the unknowns of how each scene was going to blend in, and always maintained the idea that I could paint and more importantly, detail the backdrop more easily on a workbench, while leaving room to slide them in later...  The expansion is a bit different, as the backdrops will require more of their own framing, and will have to go in before any scenery; but latest plan has been to configure expansion benchwork where it will allow me to slide them in after initial construction...  Considering just cutting and painting all layout backdrop sections blue temporarily (bare wood is getting old), and keep things so most can be removed later to more closely match scenes... 

Wanna-be artist's rendition of what things are supposed to look like:

 ....and here is where the progress is so far:

I want to get the layout back up and running for ops again.  Its been about 5 months since we have operated, and I am a little eager to try out a number of earlier changes also.  Hampton's siding will be out of service for our next run, as signaling has not been completed yet.  As time allows, the new sections will be cut in with the rest of the CTC.  Ray has already been keeping up with the latest CATS and JMRI panels for when the hardware is implemented, along with pre-wiring edge connectors for the BDL and PM42 cards.  We are diverging from earlier ways and installing a TC64 for the IO's (instead of using the SE8c cards again), but operators will continue to utilize existing signal locations until the cut-over takes place.  If all goes well, we can squeeze in some Ops before the Holidays consume everyone's free time...

Sunday, August 25, 2013

Penninsula Expansion Project Update

Sad to say, I am expanding the plywood prairie further before making much progress on the latest scenery project above Oakridge, but that is still moving forward...
Attention has moved to working on the next level of the expansion benchwork for Hampton, which will reside just above the staging yard. One revolution in the helix will be removed (between Natron and the climb to Oakridge), and in exchange trackage is being stretched out into the open on this new level with a reduced gradient.  This will reduce running time in the helix, including the addition of another long siding to improve flow across the layout, as well as adding another helper entrainment location.
Here is a view of the peninsula with the XtrakCad drawings laid out across the staging yard, used to verify benchwork dimensions of the new deck section as basic framework begins:

These drawings were printed out to lay out over the staging yard as I built the benchwork for the next level, then trimmed to fit as I relocated them up on top of the benchwork after completion.  They have helped immensely in being able to envision and move from each phase of benchwork and trackwork construction as I have progressed through this project.
So now with framework underway, the notching concept of each yard throat entering the staging yard can be seen.  This concept was developed by Ray early on when he was configuring the preliminary design work with XtrakCad.  This allows operators to have easy viewing of arriving and departing trains in staging, but is of minimal impact on space needed for the levles above.  A compressed version of the bridge crossing over Lookout Point Reservoir will reside between the helix and just above the K Falls staging entrance.  Klamath Falls staging is seen here, showing the XtrakCad drawings laid out for positioning of track alignment:

This week I completed cutting base roadbed for the track alignment, and am now working on the riser supports to maintain gradient.  Before I can begin construction on the upper deck, the backdrops will need to be added, also using masonite as intended for most other sections of the layout.  The staging perimeter will be wrapped with masonite and extend up to the top of the Hampton deck.  The final phase of this expansion project will be the Klamath Northern interchange on the upper deck.  This deck will reside in the center on top of the peninsula, but will be set back about a foot from the front of the Hampton deck with its own fascia, in an effort to divide each scene.
Latest progress showing an overall view with the Right of Way roadbed below, shows what the staging entrances now look like for Klamath Falls on the left, and Portland on the right.  Since this image was taken, the framing above Portland has been angled further back to reveal a bit more of the staging entrance:

Next up, cork, track, and trains...
Trackplan sketches have now been updated to reflect latest changes.

Thursday, July 25, 2013

Rick Daniels Passed Away July 10, 2013.

I just learned of the passing of Rick Daniels.  He was a fellow N scaler modeling the Southern Pacific's Cascade Subdivision in Oregon.  An inspiration to many of us for his talented backdrops and other multiple modeling skills.  He made use of tall scenic vistas on his large basement sized layout that was nothing short of awesome.  Unfortunately his website is no longer active, but if anyone else has pictures that they can share of his layout, they would be most welcome.  Here is a link to some of his work that he shared on one of the forums (hopefully they leave it up in memorial):
Rick's pics
We enjoyed sharing research and data specific to "the Hill" over the years, as well as other N scale and SP related info until his health finally waned near the end.  Rick will be greatly missed.
My condolences and best wishes to the family.
Rest in peace my friend.

Friday, June 28, 2013

Athearn F45 Tsunami Programming and CVs

I finally got the Atherarn F45 with Tsunami sound decoder programmed, which had not been listening to the programmer.  Use of an 18 V power supply feeding the Dgtrx PR3 allowed Decoder Pro to read and load all the needed CVs here.  Later I read that using the HO switch setting on the front of the Digitrax command station also works to give it that extra nudge for users programming via the DCS in N scale.  I am leery of excess voltage being applied to any of my units with custom lighting, so am careful to keep other locos isolated while using the higher voltage.  The Tsunami uses a number of different configuration values different from Digitrax decoders, so took some time to get the CVs remapped to match my other functions / sounds on existing decoders, as well as setting the speed curve to match existing locos.  Real happy with how this unit performs here now.  Almost every train now has at least one sound unit in consist, but hoping at this point for a next generation release of a PnP sound units pre-programmed with similar (F45) quality sound files before I spend more (now I am spoiled)....
I do not like the color of the headlight, so this unit is in the middle of a consist till the LED gets changed out (and a working rotary beacon gets added).  This placement in the middle of a consist is typical here anyhow.  Since I typically only have one sound unit so far per consist, the sound coming from the second unit seems to be the best compromise to create the proper illusion.  The Digitrax system here is configured for Universal Consisting.  That originally caused a problem because only the lead unit number can blow the horn and ring the bell.  So currently I have the first two locos assigned with the same lead unit number, and configure the CVs so that each loco position gets the proper lighting / sound effects as needed.  This actually works pretty good. 

Here is a list of the CVs that I changed to get this unit to run with my other (Digitrax) power on the layout.

 CV-Value
  03-05 (accl)
  04-05 (decel)
*14-00 (?)
  17-217 (loco addy 66) or  + 17-XXX (to match lead)
  18-228 (loco addy 28) or  + 18-XXX (to match lead)
  25-16 (spd table)
  29-54 (config reg)
*30-00 (shifts function map)
+33-00 headlight
+34-00 rear light
*38-00 (move dynmcs)
*39-08 (move dynmcs)
*49 thru 52 @128 (?)
 67 thru 94 @ 03-100 (spd table)
 209-100 helps slow speed response
 210-05  helps slow speed response

With Decoder Pro, check the "use speed table", "user defined speed table", and "match ends" using 03-100
* denotes settings after changes, that were used to match sound Function keys on Digitrax decoders
+ denotes settings configured to use as middle unit utilizing lead unit eng #

Hope the above saves someone prog time, as this is another hobby in itself at times...

Wednesday, June 26, 2013

SD9's back in service

After inquiring with Digitrax on the stall issue (see last post), they got back to my email in less than an hour!  What was confusing me was the fact that one loco would stay running while the other stalled, even though they were MUed together...  So they recommended resetting Ops Sw 36 and 38 on the DCS100.  I thought that would do nothing, but after resetting they appeared to be back to normal?  Thinking that it was just coincidence, I kept running the locos MUed together for an extended period.  Never stalled when hooked together again.  So then moved to running them independently, but then each was stalling again.  I tore them both down again and re-cleaned the wheels and needle bearings.  After inspecting closer with a 10x magnifier, it appeared there was maybe oxidation or residue that the alcohol missed last time around.  This time I used brake cleaner and burnished the contacts followed by alcohol.  There is a heavier current draw for the sound decoders, and it looks like they are way more prone to drop-out as compared to conventional decoders.  For now, they are running much better, but still a bit temperamental (more testing needed).  I suspect for these two units that meticulous cleaning on regular intervals is going to be necessary, but have not found the need to do so on any of my other sound units...  I have the nod of approval to return these decoders for exchange if needed, as they mentioned it is possible for a weak spot on the decoder.
Final Analysis at this time:  inconclusive

Sunday, June 16, 2013

Digitrax Sound Decoders with Stalling Issue?


Trying to troubleshoot what is taking place with a couple locos I have on the layout that are equipped with Digitrax sound decoders..Here is a vid I took last night showing what I am combating here:


These chassis are both N Atlas SD9's MUed together via jumpers in an effort to diagnose why the sound decoders (SDN144AO) fail even with a combined 12 axles for electrical pick-up. Are these sound decoder boards in need of replacement?  I have a number of these decoders in use on the layout (in various locomotives), and none exhibit the same characteristics as these latest two that I purchased together.  They worked fine for a few opp sessions and now are both completely useless running solo, stalling every one to two feet on clean track with clean wheels.One would assume that both units would stall at the same time since electrically MUed, but obviously not the case. Watching the vid one can see the headlight drop out as well as sound reset when locos stall.  We have tried wiggling the decoder boards to check for loose fit while MUed, but there is No evidence of that being a possible cause for decoder dropping out. Of note is that SD9's with conventional non sound decoders (DN163AO) perform flawlessly through this track section even when running solo (as well as above mentioned other units using this same SDN144IO decoder operate fine)....
I will contact Digitrax and see what their recommendation is next.  I am thinking something is internally wrong with one of the components on the board regarding this particular run of decoders that I purchased together.
Anyone else seen this, have ideas / feedback?
Ya I know the sound file is in need of help, but that will follow...


Saturday, May 25, 2013

Yes the RR is Still Alive

Been getting back into the swing of things on the RR here, now that the work picture has improved a bit.

Foremost, I have been quite eager for the release of the Wheels of Time PC&F Insulated Boxcars, especially in my home road... and picked my order of cars up from my favorite hobby shop today!

I am impressed with everything about these cars all the way down to the metal wheelsets and how they got the wheel profile correct (oh wait, those are BLMA trucks! ...with Athearn wheels?).  The only gripe I have at this point is the choice of steel weights for the few of us that actually use the MT couplers, and a number of them have unresponsive couplers over the uncoupling ramps that I will have to investigate.  These along with the few other road names I picked up are truly a welcome addition to the roster here.
I will be retiring and selling off all my Micro Train "FMC" SP / SSW dbl door boxcars now that these have arrived.  The MT cars were great for their time, but the dimensions are just too far off for me, and I prefer the old Roundhouse/Athearn and Fox Valley body styles for these.  The current stable of FMC dbl door box style here is heavy handed, so the new PC&F cars will help to balance out the fleet.  Already got my order in for WOT's second release (in SSW paint).  Rumor is one of my all time favorite cars will be released later and drain my wallet if a correspondence I had with Matthew is interpreted correctly....

 So, after the layout sat idle for an extended period, I encountered a few issues that appeared which I am going to try to blame on that A/C failure during last summer's heatwave.
Two of my mainline handlaid turnouts had a stock rail lift on more than just a few pc ties, but fortunately just a matter of reheating the joints and now back in service.  Those two turnouts are probably close to 15 years in service, so still pretty proud on how reliable and durable all the handlaid turnouts have proven to be over all the years.
Then I had a couple more flex track sections that warped and came loose from the benchwork, but once ballasted wont have a chance for a repeat offense.
The biggest fix was regarding one of the yard throats into staging. The #7 Atlas turnouts there have been causing locos to stall.  I really appreciate Atlas for their great strides in pushing N scale, but their use of production in China has left a few rough edges.  Hoping their next run of code 55 turnouts are an improvement for all my fellow modelers.  I am at over a 50% failure rate with the nine turnouts that I utilized in the Klamath Falls yard throat.  Power is not being routed through the turnouts, as their internal power feeds are not "hardwired".  I have had to drop numerous feeders to power dead rails on these turnouts.  Was contemplating being lazy and use a couple of their #10's for the Hampton expansion, but still on the fence if to go back to handlay as I push forward on the next phase of the expansion...
Other little fixes since the layout was dormant for so long was a few cranky Tortoise motors that refused to throw when reversing.  I only run about 5 volts to them to simulate that proto slow motion speed, so they were stalling for some reason.  Fortunately they seem to have come back to life after using them repeatedly for awhile.  Might have to bump up the voltage a bit more if it becomes a problem, but not real sure what is going on since it has worked fine for so many years previous...
Last little noteworthy fix was repair of the roadbed at Oakrdige siding where the trackage had developed an unnatural hump.  Appears that all the moisture from multiple workings of the plaster there had warped where two plywood sections joined together, so only solution was to reinforce things there with a piece of metal sheet stock.  Aint it pretty?  Someday yet more plaster will blend it all in.

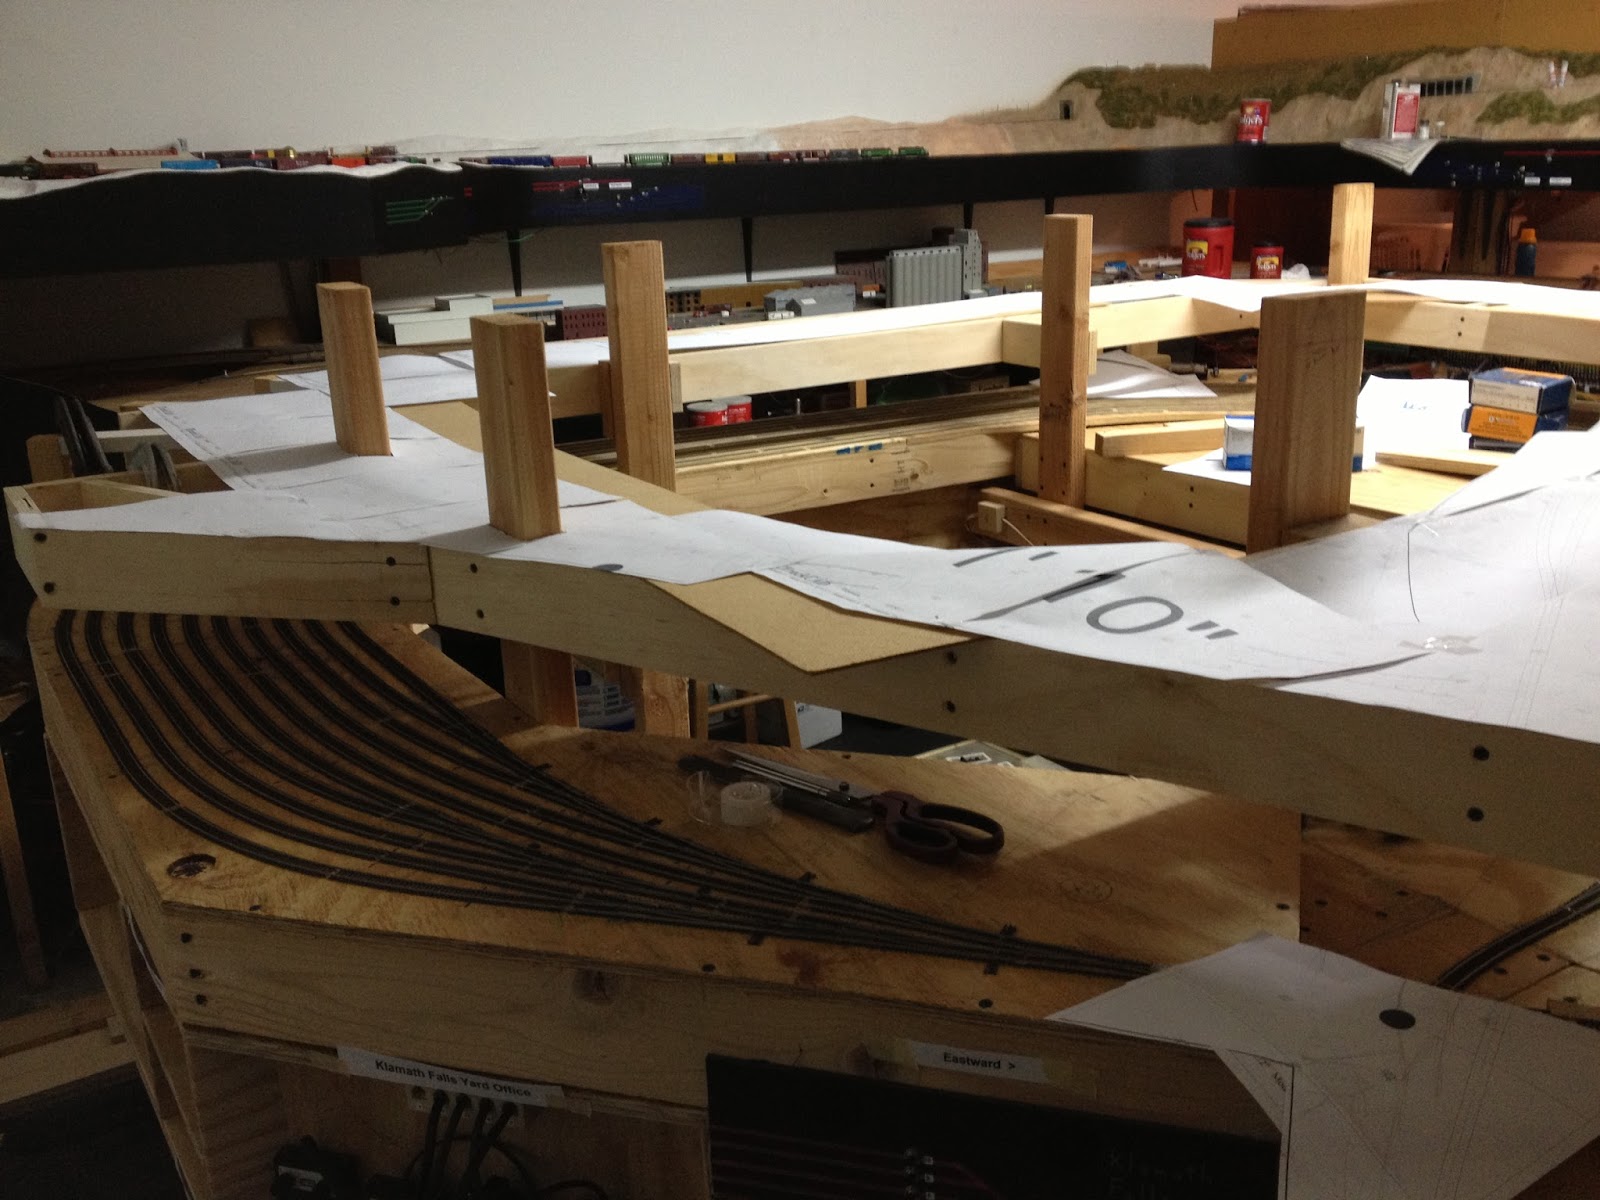
 Meanwhile, been acquiring materials for the Hampton siding expansion phase, and currently have Ray's CAD overlay cut out and draped across each end of staging.  We are fine-tuning how the benchwork is going to come out of the helix and still leave K Falls and Portland Yard throats readily visible, and how to pull off the scenic aspects of this undertaking in what space there is to work with.  This project is all about adding another siding for operations, removing some of the down time inside the helix, while hopefully still getting some antiquated resemblance to this section of the RR.  The layout is not linear in configuration to begin with, but now that it has taken on the "G" shape configuration, it is one of my goals to make it as user friendly for the operator to be able to walk with his train and / or view signals from a perspective that makes it as clear and user friendly as possible.   The design is for some version of the crossing over Willamette River at the head of Lookout Point Reservoir (even if somewhat condensed), and a siding that holds the monster trains on the layout.  This whole concept is nothing like I have seen before, and it will be a challenge to pull it off, but I think there is some hope...

Before I tear into the benchwork on this next phase, I am trying to make an attempt to push forward on some scenery around Oakridge to make it more entertaining for operating crews meanwhile, instead of the long trek across yet even more plywood prairies... I have made slight progress around the rock shed area, which could have been extensive progress if I had kept better notes.  I had trouble matching colors for the base coat on my plaster, as five + year old abbreviations were misinterpreted, resulting in plaster coloring that had to be reworked.  Got that resolved only to find that the brand new replacement scissors I ordered for cutting my polyfiber didnt work as well as the original set from the same manuf part #...  Yes they were made there also...  but stumbling along best I can with what I got at this point.

Art brought over some BLMA 89' flats recently for a test run on the layout.  We mixed them into a 23 car TOFC train (20 89' flats, 2 skybox and a hack), that runs regular on the layout, spreading them in different parts of the train.  We placed a couple right behind the head end, and a number spaced randomly throughout the rest of the train.  They revealed a minor flaw in the atlas turnouts that first had to be attended to.  The BLMA wheels were derailing on the stock rail where the notch is cut for the point rails....  after passing over this notch with a few light file swipes they performed flawlessly through the turnouts.  My helix is the ultimate durability test for trains, and the stresses were at their limit for these new cars.  The complete sets of BLMA cars worked well together, but we did have some uncoupling events up near the front of the train where they were placed between Micro Train flats.  The MT flats have varying height couplers for whatever reason, so this appears to have contributed to what uncouplings we had.  I have had to strategically place my MT flats in order where the couplers line up to avoid uncoupling.  The only major issue we had was with the lead BLMA car coupled behind the power. On some occasions the lead truck would derail, so not sure yet, but figuring this is due to a combination of body mount and fine flanges under extreme circumstances.  I run MT LP wheels and FV metal wheels on the MT flats currently in service on this train, and it is running at its maximum reliable length already.  Overall analysis is that the BLMA cars are going to fit in fine with their own strategic placement also.

In the sound department, I have been toying with my SD9's and the sound files I downloaded from John McMasters.  His units sound great in HO scale, but I am still stumbling along with mine here.  Digitrax seems to have forsaken the sound project side of things, and kind of dissapointed that in the last year little to no sound product releases have materialized from any of the manufacturers pushing the envelope for N.  I suppose economic conditions have some impact there...  The bright side on the sound department here is that Ray picked up an Athearn F45 in BN colors (with Tsunami) that will be living here.  

It makes the Digitrax sound effects seem kinda limp, but I am glad to at least have sound that fits into my other Hood units.  The F45 will take the lead and augment the current BN SD40-2 which acts as pool power heading up a manifest off the BN.  Currently working on how to read / write this loco with Decoder Pro, but once I swap my 12v PS with an 18v for the PR3, anticipating that it will resolve program issues.  Hopefully not going to turn into another "project"...

Lots more in the works...
Hope we can get back to more regular updates of the RR in the months to come.